I have released an update to this blog post: See CheckPoint SNX install instructions for major Linux distributions
In what is becoming a bit of a series, today I’ll be covering how to get Check Point SSL Network Extender installed under kubuntu. From the checkpoint site:
SSL Network Extender is a browser plug-in that provides clientless remote access, while delivering full network connectivity for any IP-based application.
It works based on java so the first thing you will need to install is sun’s java runtime client. You will need the partner repository installed and your system updated.
sudo apt-get install sun-java6-jre sun-java6-plugin sun-java6-fonts
Once that is done you can restart Firefox and browse over to java.com to make sure that you have java working.
You should see a message like this:
Verified Java Version
Congratulations!
You have the recommended Java installed (Version 6 Update 24).
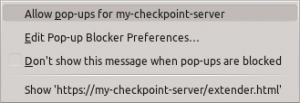
Once java is working you can go to the snx website. If you don’t know the url ask your network administrator. You may be notified about popups so just allow them for your site.
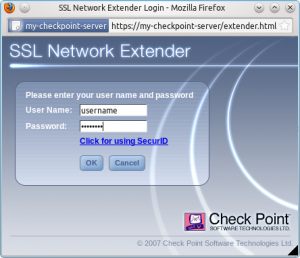
 Once you have accepted and reloaded the page you will be prompted to enter your username and password.
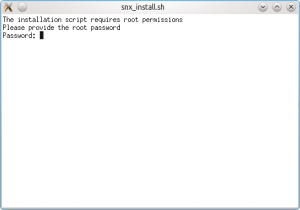
 After this you will be asked to install an update to the software. This installs the snx software in the background. One thing to note is that it is looking for the root password and not the sudo password. Ubuntu ships without this set so you’ll need to set a root password using the following command.
sudo passwd
You can confirm it’s set correctly using the command
su -
and if you see the prompt change to “#” then you know it’s working. Switch back to the snx_install.sh window and enter the password.
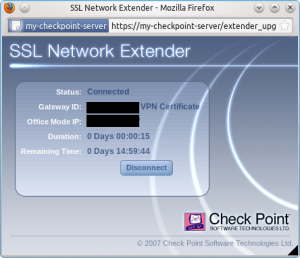
 Once you do that you should very briefly see a message saying that the install was successful. At this point the standard snx software is installed but you will probably see the error
Failed to initialize
When you run the snx client on the command line you will see:
user@pc:~$ snx
snx: error while loading shared libraries: libstdc++.so.5: cannot open shared object file: No such file or directory
The solution is to install libstdc++5
sudo aptitude install libstdc++5
Once that is done typing snx should be error free and give you something like this:
user@pc:~$ snx
failed to open file: /home/username/.snxrc
Valid attributes are:
- server          SNX server to connet to
- sslport         The SNX SSL port (if not default)
- username        the user name
- certificate     certificate file to use
- calist          directory containing CA files
- reauth          enable automatic reauthentication. Valid values { yes, no }
- debug           enable debug output. Valid values { yes, 1-5 }
- cipher          encryption algorithm to use. Valid values { RC4 / 3DES }
- proxy_name      proxy hostname
- proxy_port      proxy port
- proxy_user      username for proxy authentication
user@pc:~$
You’re still not home and dry because you may need to accept the VPN Certificate. To get around this you need to login via the command line and press “Y”.
user@pc:~$ snx -s my-checkpoint-server -u username
Check Point's Linux SNX
build XXXXXXXXXXXX
Please enter your password:
SNX authentication:
Please confirm the connection to gateway: my-checkpoint-server VPN Certificate
Root CA fingerprint: AAAA BBB CCCC DDD EEEE FFF GGGG HHH IIII JJJ KKKK
Do you accept? [y]es/[N]o:


