Preparing your Acer C7 Chromebook to install GNU/Linux

  1. Purchase a Acer C7 Chromebook
  2. Enable developer mode
    • Invoke Recovery mode, you hold down the following keys:
      ESC, first key on the left on the very top row.
      F3/Refresh, fourth key on the very top row
    • Touch the Power button, located just under the left hinge. This will display the prompt “Chrome OS is missing or Damaged Please insert a recovery USB stick.”
    • Press ctrl, the first key on the left on the very bottom row, and D. This will display the prompt “To turn OS verification OFF, press ENTER. Your system will reboot and local data will be cleared. To go, back press ESC.”
    • If you are happy to proceed then press Enter
    • Wait and the system will beep twice. Then the system will go into developer mode which can take 5 minutes. After a reboot you will get the prompt “OS Verification is OFF Press Space to re-enable” followed by two beeps
    • You will be brought back into a new Chrome Install, where you normally select, your language, keyboard, and network.
    • Press and hold the following keys to get a Crosh shell:
      • ctrl, the first key on the left on the very bottom row
      • alt, the key to the left of the space bar
      • F2/Forward (->), third key on the very top row
    • type root to login
    • type the following to enable booting from a USB, booting from the SD will not work
      • crossystem dev_boot_usb=1
      • crossystem dev_boot_legacy=1
      • crossystem dev_boot_signed_only=0
    • type reboot to reboot the system
    • At the “OS verification is OFF” prompt press ctrl, the first key on the left on the very bottom row, and then at the same time the letter U to boot from the USB Stick.

At this stage the simplest option is to install ChrUbuntu (ChrUbuntu: One Script to Rule Them All!). I would recommend doing this even if you are not going to continue to use Ubuntu, as the script takes care of all the nasty partitioning steps for you.

This article is a summary of the information gleaned from the following websites. All credit goes to the maintainers of these sites:

Posted in General | Leave a comment

Checkpoint SSL Network Extender and Fedora19

I have released an update to this blog post: See CheckPoint SNX install instructions for major Linux distributions

Due to a change in the way CheckPoint are now rolling out policies, the native snx client and SSL client require different policies. This means that you may be in the situation where you need to run the SSL Network Extender to gain access to the network. This seems to call the native client with the -Z switch.

I was unable to connect even after following this tutorial “Install Oracle Java JDK/JRE 7u25 on Fedora 19/18, CentOS/RHEL 6.4/5.9″ and confirming that java was in fact installed and verified working. It was only when I installed and succeeded in getting it working on CrunchBang Linux, that I released that Fedora is running SeLinux now so seamlessly that I forgot that it is even running.

I tailed the log files and saw messages relating to the snx client

tail -F  /var/log/audit/audit.log /var/log/messages
Aug  7 00:00:00 pc setroubleshoot: SELinux is preventing /usr/bin/snx from using the dac_override capability. For complete SELinux messages. run sealert -l 00000000-0000-0000-0000-000000000000

Running sealert -l 00000000-0000-0000-0000-000000000000 as suggested resulted in the answer

*****  Plugin mozplugger (99.1 confidence) suggests  *************************

If you want to use the plugin package
Then you must turn off SELinux controls on the Firefox plugins.
Do
# setsebool unconfined_mozilla_plugin_transition 0

Once that was done, SNX worked fine. Be warned that this allows all plugins not just snx.


Posted in snx | 1 Comment

Adjust LCD brightness from the command line

Sometimes I just need to do this.
echo -n 15 > /sys/class/backlight/acpi_video0/brightness

Posted in General | Leave a comment

fix_tags – manipulate ID3 tags and then some…

I would like to introduce you to a tool that you have probably needed or will need some time. It’s called fix_tags and is written by my friend Mr. Dave Morriss, lead developer at Hacker Public Radio. While the tool claims to only change the tags in MP3 and OGG, it also modifies WAV and FLAC without problems as well.

It’s hosted over on the HPR Gitorious site, but if you just want the tool itself just copy the file from here: fix_tags. I saved it in /usr/local/bin/fix_tags, which makes it available to everyone on the system and then changed permissions so that it could execute.

chmod +x /usr/local/bin/fix_tags

It’s written in perl, and has some dependencies on some perl modules which can be installed easily from cpan. Most distributions install cpan by default but for some reason I needed to install it on Fedora. You will also need to install development tools and Perl Documentation if you haven’t already done so.

Debian:

apt-get install build-essential perl-doc

Fedora:

yum groupinstall "Development Tools" && yum install perl-CPAN perl-Pod-Perldoc

Now that cpan is installed, we need to update it, reload it and then install the perl dependencies. You do this by running the command cpan as root

install CPAN
reload cpan
install Modern::Perl Getopt::Long Pod::Usage Data::Dumper File::stat Date::Manip::Delta Date::Manip::TZ Audio::TagLib
quit

While there is complete help available by typing perldoc fix_tags you can get a good idea of what awaits by typing fix_tags –help

Version 1.2

Usage:
     fix_tags [ -help ] [-album=ALBUMSTRING] [-artist=ARTISTSTRING]
        [-comment=COMMENTSTRING] [-genre=GENRESTRING] [-title=TITLESTRING]
        [-track=TRACKNUMBER] [-year=YEAR] [-[no]fix_comment] audio_file ...

Options:
    -help   Prints a brief help message describing the usage of the program,
            and then exits.

    -album=ALBUMSTRING
            Sets the album tag to the string defined by the option.

    -artist=ARTISTSTRING
            Sets the artist tag to the string defined by the option.

    -comment=COMMENTSTRING
            Sets the comment tag to the string defined by the option.

    -genre=GENRESTRING
            Sets the genre tag to the string defined by the option.

    -title=TITLESTRING
            Sets the title tag to the string defined by the option.

    -track=TRACKNUMBER
            Sets the track tag to the number defined by the option.

    -year=YEAR
            Sets the year tag to the number defined by the option.

    -[no]fix_comment
            If selected, causes the comment tag to be edited to remove
            non-graphic characters, newlines and multiple space sequences.

To use the tool just point it at a file and it will show you all the common fields that are of interest.

$ fix_tags 955-The_Loss-Return_to_Litany.mp3
955-The_Loss-Return_to_Litany.mp3
album     : MIND OUT
artist    : Return to Litany
comment   : http://www.jamendo.com Attribution-Noncommercial-No Derivative Works 3.0
genre     : 
length    : 00:04:09
title     : The Loss
track     : 0
year      : 2012

As an example you could change the genre by using fix_tags -genre=”cchits.net” 955-The_Loss-Return_to_Litany.mp3. Resulting in:

$ fix_tags 955-The_Loss-Return_to_Litany.mp3
955-The_Loss-Return_to_Litany.mp3
album     : MIND OUT
artist    : Return to Litany
comment   : http://www.jamendo.com Attribution-Noncommercial-No Derivative Works 3.0
genre     : cchits.net
length    : 00:04:09
title     : The Loss
track     : 0
year      : 2012

An excellent tool from a most Excellent Gentleman.

Posted in General | Leave a comment

hpr1027 :: Migrating away from Google Reader – Feed2Imap

Back in 2012-07-10, I did a Hacker Public Radio episode entitled, “hpr1027 :: Migrating away from Google Reader“. Given the current news that Google is to shut down Reader, I thought I would re-post the episodes show notes here as a reminder. I have been running this IMAP solution on a raspberry PI from my home without issue since then.

Getting a list of my feeds

Google should be credited with the fact that they make exporting very easy to do. Thanks to the work of the http://www.dataliberation.org/ team. Who’s stated goal is “Users should be able to control the data they store in any of Google’s products. Our team’s goal is to make it easier to move data in and out.”

For Google Reader this amounts to:

Settings -> Reader Settings -> Import/Export -> OPML

OPML (Outline Processor Markup Language) is an XML format for outlines (defined as “a tree, where each node contains a set of named attributes with string values”). Originally developed by Radio UserLand as a native file format for an outliner application, it has since been adopted for other uses, the most common being to exchange lists of web feeds between web feed aggregators.

From Wikipedia, the free encyclopedia https://en.wikipedia.org/wiki/OPML

That’s it. You now have a list of all your feeds we are still faced with the problem of reading/deleting items in one place and having them synchronized everywhere else ? The answer is actually quite obvious.

imap – Internet Message Access Protocol

From Wikipedia, the free encyclopedia

http://en.wikipedia.org/wiki/Internet_Message_Access_Protocol

Internet message access protocol (IMAP) is one of the two most prevalent Internet standard protocols for e-mail retrieval, the other being the Post Office Protocol (POP). Virtually all modern e-mail clients and mail servers support both protocols as a means of transferring e-mail messages from a server.

The great news is that there are imap clients everywhere. Microsoft Outlook supports it. Thunderbird, Evolution, Kmail, Claws-Mail all support it. It’s supported on Android, the iPhone, and on Windows Mobile. There are a multitude of web clients. The only problem now was to find a way to get the RSS feeds over to a imap message format. A quick duckduckgo search later lead me to ….

Feed2Imap

http://home.gna.org/feed2imap/

Feed2Imap is an RSS/Atom feed aggregator. After Downloading feeds (over HTTP or HTTPS), it uploads them to a specified folder of an IMAP mail server or copies them to a local maildir. The user can then access the feeds using Mutt, Evolution, Mozilla Thunderbird or even a webmail.

It’s in all the major repositories and I had it up and running in under ten minutes. It keeps it’s settings in a hidden file .feed2imaprc in your home directory. The configuration is simple, four lines per feed.

feeds:
 - name: kenfallon.com
   url: https://kenfallon.com/?feed=rss2
   target: imap://RSSNewsAccount%40example.com:PasswordForRSSNewsAccount@imap.example.com/INBOX.Feeds.Tech_Blogs
   include-images: true
...

The name filed is what will be the feed name and url is the link to the rss feed. The target is the path on the imap account you want to put it to. I used a throw away email account on my own domain with some restrictions on the size so that if I forget to check it won’t affect the rest of my mailboxes.

The line it’s broken into several parts, first is imap:// followed by the imap account user name and password. If your login contains an @ character, replace it with %40. Next is the @ sign followed by your server hostname and then the path. I chose INBOX.Feeds and then a subfolder for every group I had in Google Reader. The only other option I set was to include the images.

opml2feed

I have quite a few feeds now and I did not want to be typing them in by hand. So I wrote a small perl script to convert the opml file into a .feed2imaprc format and it will hopefully get you most of the way. The code is available on https://gitorious.org/opml2feed ( thanks to Klaatu over at http://www.gnuworldorder.info/ where he covered using Git in the March 31, 2012: Episode 7×13.)

Now setup the imap account on your mail client(s) and once you are happy run feed2imap and you should see the items beginning to appear. I set it to run every two hours at 14 minutes past the hour by adding the following line to my cron tab.

14 */2 * * * /usr/bin/feed2imap >/dev/null 2>&1


Posted in General | 1 Comment

rsync: mkstemp “…” failed: No such file or directory (2)

For the third time the disk in bay 4 of my Iomega StorCenter ix4-200d, failed, and finally the good folks at Iomega/Ems/Lenova sent me a brand new ix4-300d. As far as I can see it’s the same thing but with some bug fixes, more bling and a lot of cloud™.

hpic-ix4-300d

I’ve been relying on rsync as the backbone of my backup solutions for years and so naturally I was going to use rsync to copy the data from the old nas box to my new one. So I set up the new NAS, then set up rsync in a screen session on my desktop and walked away.

The following day a quick comparison showed a 3GB difference between the source and destination. When I re-ran the rsync, I was suddenly faced with loads of error messages from the un-synced files that I had not noticed before.

rsync: mkstemp “/new/path/to/files/some:file.txt” failed: No such file or directory (2)

Searches on the web threw up information which to be honest didn’t help a lot and didn’t give a concrete explanation for what is going wrong. So left to my own I decided that the problem probably wasn’t rsync and that it was trying to tell me what was wrong. The searches on the internet suggested that the issue was related to file/directory permissions. I confirmed that this wasn’t the case and was able to create files on the old and new nas without problem. These files were even synced when I reran rsync.

So then the problem must be the files themselves. This was worrying as this meant that 3G of my files may be corrupt but keeping a cool head I had a look at the files themselves and then it hit me. All the file names contained characters outside the nice clean [0-9A-Za-z] range, and then I had a look at the type of mount and I noticed the source (old nas) is mounted over NFS while the destination (new nas) is mounted over CIFS. Looking at the list of error files, it became obvious that all the files contained reserved characters that are not acceptable on CIFS/Windows file systems. So the simple solution was to disable the default CIFS share and setup NFS shares and use those. Sure enough a few minutes later rsync was copying the files without issue.

The moral of the story is “read the screen” the only problem is that sometimes it’s difficult to interpret what it’s saying. So instead of focusing on No such file or directory (2), I needed to look at rsync: mkstemp “/new/path/to/files/some:file:with:colon:in:the:name.txt” failed: and ask why is it failing.

Posted in General | 4 Comments

Citrix on linux

I have a series on Citrix and while support is getting better, they do tend to change things. For example the location of the binary binary binary binary.

They have also moved the location of the application from /usr/lib/ICAClient to /opt/Citrix/ICAClient, a more unix like move.

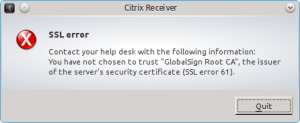
The famous SSL error 61

SSL error 61

The SSL Error 61, is now easily fixed by copying the certs into the correct directory

cp -v /usr/share/ca-certificates/mozilla/* /opt/Citrix/ICAClient/keystore/cacerts/
Posted in citrix | Leave a comment

Checkpont SNX on Ubuntu 11.10 (oneiric)

I have released an update to this blog post: See CheckPoint SNX install instructions for major Linux distributions

It’s time for Ubuntu 11.10 and the obligatory how to get Checkpoint SSL extender VPN (SNX) working under it.

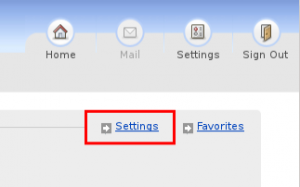
The first step is to get your username, password and ip address or host name of your snx server from your local administrator. Once you do that you can login and then press the settings link. This will give you a link to the various different clients. In our case we are looking for the “Download installation for Linux” link. Download that and then run it with the following command.

# sh +x snx_install.sh
Installation successfull

This is the 64 bit version and I’m installing a 32 bit application, so you’ll need to install the 32 bit libraries and the older version of libstdc if you haven’t all ready.

# uname -p
x86_64
# aptitude install ia32-libs libstdc++5

Now let’s check that the required libraries are loaded.

# ldd /usr/bin/snx | grep "not found"
        libpam.so.0 => not found

This is a new one so a quick check on Google found the answer in of all places the Citrix forum.

Combining the post from Stuart Johnston, and Israel Diaz you get:

# wget http://packages.ubuntu.com/km/precise/i386/libpam0g/download 
# mkdir tmp
# dpkg -x libpam0g_1.1.3-7ubuntu2_i386.deb tmp
# cd tmp/lib/i386-linux-gnu/
# cp libpam.so.0.83.0 /lib/i386-linux-gnu
# cd /lib/i386-linux-gnu
# ln -s libpam.so.0.83.0 libpam.so.0
# ldd /usr/bin/snx 

You should now be able to type snx without errors. You only now need to accept the VPN Certificate by loging in via the command line and press “Y”.

user@pc:~$ snx -s my-checkpoint-server -u username
Check Point's Linux SNX
build XXXXXXXXXXXX
Please enter your password:
SNX authentication:
Please confirm the connection to gateway: my-checkpoint-server VPN Certificate
Root CA fingerprint: AAAA BBB CCCC DDD EEEE FFF GGGG HHH IIII JJJ KKKK
Do you accept? [y]es/[N]o:

Finally you should be able to use the client and login.

Posted in snx | 5 Comments

Open Source Mosquito Locator

I’m looking for help with a project that will provide a way to locate mosquitos. Yes I am serious.

A Mosquito on an arm

Remember this is not the army. We don’t “locate and destroy”. We’re following the Unix  philosophy of doing one job and doing it well. This job is to “Locate“.

It should be simple.

It should be cheap to make and cheap to run.

There is no requirement to identify species, gender, age, colour, etc. Let “if it’s acting like a mosquito then it’s a mosquito” be your mantra.

Let’s be clear, this is just to locate them not to terminate them with lasers, automatic weapons, flame throwers, etc. If you want to do that later then be careful. For now the task is to locate them and signal where they are. When they move, locate them and signal where they are.

I have absolutely nothing to contribute to this project, but it needs to be done.

If you have any ideas on how you would go about doing this, then I’m very interested in hearing from you.


Posted in General | 21 Comments

Thoughts on Time, Submarines and OggCamp

I’m at John Lennon International airport, having a coffee and looking over at a big yellow submarine. I walked past that submarine looking for a bus to take me to OggCamp12. The first stop was the “wave bar”, where the universe of bus tours merged with that of OggCamp.

OggCamp. The gathering of enthusiasts who had answered the call and converged to bring the message of free culture, open source, hardware hacking, and the commons to the inviting arms of Liverpool. That and helping wheel chair bound pensioners navigate the seemingly endless supply of steps that made up the bar.

The following morning we made the short walk way up the hill to the venue at Liverpool John Moores University. It was hot which was a shock and the third dimension was also a bit of a shock after 10 years in the flatlands of Holland.

The building Dan had scored was a m a z i n g !

The crew Les had assembled were a m a z i n g !

So efficient was the crew that everyone was setup and ready to rock with the efficiency that would make even the most professional rail way scheduler do some serious soul searching.

We waited.

Then the last prize was given away and everyone cheered to thank Dan for all the hard work and bam !!!

OggCamp was over.

And then it hit me, time our old friend was playing tricks again. The old “one minute you’re holding them in your arms and the next minute they’re out the door” trick that parents the world over are familiar with.

I took a deep breath and dismantled the booth, had my photo taken and made my way back to the Hotel to start the job of editing. As I listened to the recordings, the whole event started playing back to me. My tour of the exhibition area, the banter at the HPR booth, the chance meetings in the halls, the enthusiasm of the hardware hacking area, the live session with 20Lb Sound, the morning after, the carrot cake, the outside interviews and then the raffle.

I hadn’t missed it. I was there. I was part of it. And thanks to the good people at Leaf, we had a chance to relax, catchup and say goodbye to at least some of the friends we had met old and new.

Learning from the mistakes of last year, all the 36 interviews will be posted and released this week on Hacker Public Radio for my enjoyment and I hope for yours. So I’d like to thank everyone that put on the show, that participated in it and that made me feel at home. A special thanks to Paul for suffering me been so stressed and to Manon and the toots for suffering me in general.

So now time slows down again and twelve months is a long time to wait for the next OggCamp.

That said it’s only six months until FossDem.

Might even do a booth there.

I’d need someone to help me out though.

Hmmmm something to think about.

Still an hour to wait.

I can’t shake the idea that that submarine may have served a previous role in the water purification industry.

Posted in General | 4 Comments